How to Use a Diffuser For The Perfect Curls and Waves Each Time

Curly hair is notoriously unpredictable, and the soft, brilliant curls that adorn red carpets and magazine pages may be tough to maintain. Every individual with naturally curly hair can tell you that those picture-perfect curls at home are difficult to obtain. The correct hair cocktail and hair tools may make life so much simpler.

Another thing you need is a decent diffuser (always God’s gifts to natural curls) rather than spending hours straightening your frizzy locks and then cultivating them with iron or even an iron curling, a wand, or even hair straighteners and hair rollers.

What is a Diffuser?

A diffuser is a blow dryer accessory that disperses the air to minimize cold conditions and keeps natural wave patterns from being disrupted. It’s ideal for any texture, from corkscrews to wavelengths. Many of us curly ladies heard the benefits of diffusing, but we were left with more frizz than air drying after testing a diffuser for the first time. Diffusion may be a vital stage in your routine – if you know-how to do so.

Why Use A Diffuser For Curly Hair?.

The air force from a hairdryer might damage the way in which your hair clumps into a certain wave or curling. A hair diffuser may lower your hair’s air velocity and allow your hair to dry without disrupting the curls. Spreaders are also useful for those who rush swiftly and safely to dry their hair.

Besides drying time, the volume of your waves is maximized and you get the illusion of thicker, more full hair. Some people have claimed that when they diffuse they suffer much frustration and this may be due to the wrong usage of the diffuser. It will increase the volume, but it should be done with the correct procedures and product use.

You might also need to get The Best Hair Products that suit your curly hair type for better maintenance of the beautiful curls!


The Benefits Of Using A Diffuser:

  • When done correctly, it avoids frizz.
  • It does not affect your natural bending pattern.
  • It accelerates the period of drying without adding frost.
  • The heat from a blow dryer is less harmful.

How To Use A Diffuser?

This is how you can perfect your technique for big, defined curls if you’re new to diffusing. Make sure you have a diffuser on your hair dryer before you start (many will fall off). Look for a universal diffuser fixture such as a universal pop-up silicone fit or the hot sock. It’s most suitable for dryers.

Step by Step on How To Use A Diffuser:

1. Shape Your Hair And Dry

Use “prayer hands” on extremely damp hair to lay in your favourite products. In at least 90 seconds, squeeze and squeeze. The basis for this is solid.

2. Towel Dry Your hair

This is done so that your hair is not damp. To write out the water excess before drying, use a microfiber towel or a t-shirt.

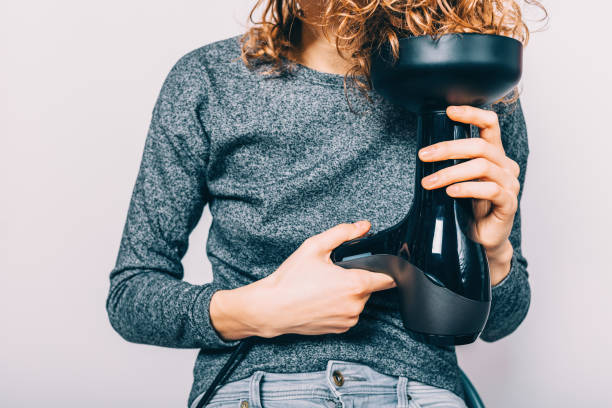
3. Set The Diffuser Temperature

Low airflow and mild heat combine perfectly with drying settings without undue harm and damage to your hair.

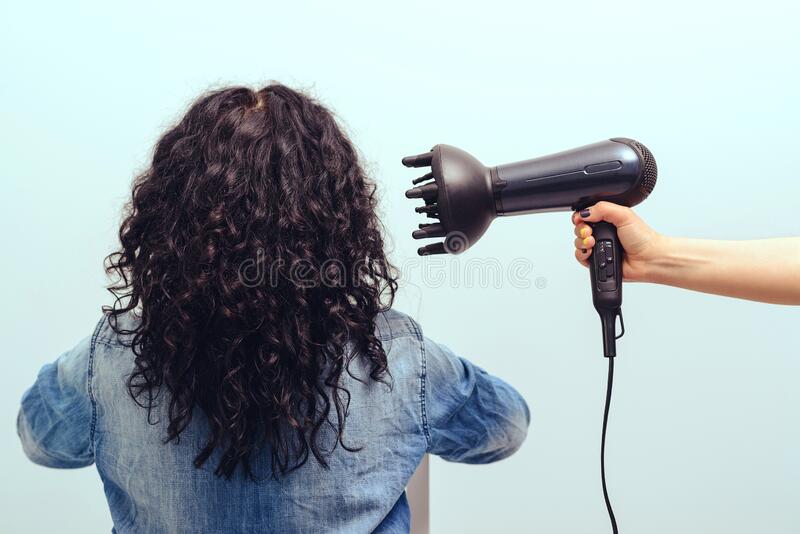
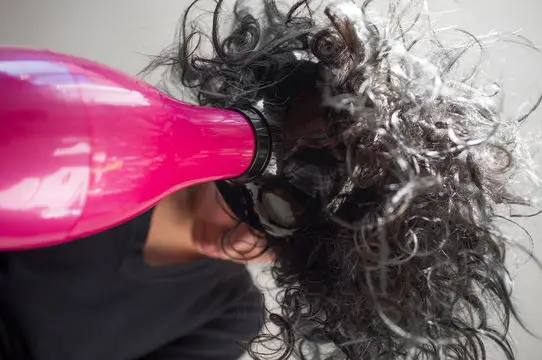
4. Use The Diffuser On Each Curl

Hover over your head to dry the diffuser outside of the curl until the hair is tight, but always moist. Then cup the curls softly with the diffuser, careful not to retain them for too long in one area.

You don’t want to continually reposition the diffuser, because this might make it more scary. Just focus on one region, get as dry as you like, then go into the next section.

Pro Tip: Do not drag your fingers through your hair while you are spreading.” The worst thing you can do for your curls is to hold your hands in them as enticing as they might be. Natural oils and any kind of contact on your hands can split curls and create friction.

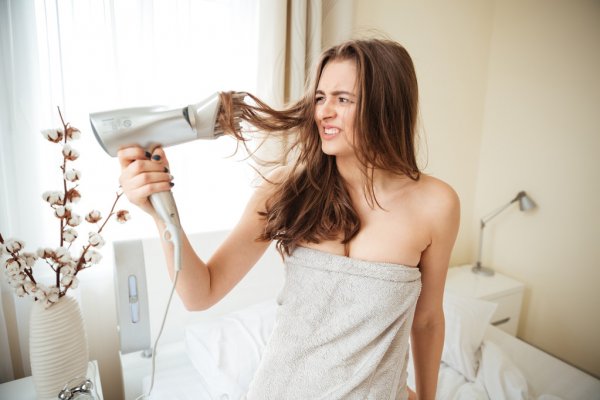
5. Don’t Worry About Flipping Your Head

One goal is to spread a booming, voluminous hairdo. You may attain this stunning male if you are not frightened of flipping your hair.” If you try other postures such as turning your head over or leaning backward or sideways, you may generate a maximum volume with less friction.

6. Distribute The Curls

After the hair is dry, squeeze it a bit further to aid the volume and break any big clusters. Use a pick for more volume to lift the hair roots to the crown. To minimize the cold, avoid touching the curls all day long.

7. Repeat The Steps


After Diffuse Care:

When your hair is dried, you can see your curls being stylishly cast on, while the hair is wet. Cut out the crunch” with a tiny bit of light curl that defines the cream across both hands and lifts your curls from the ends to the roots. This breaks down the hard cast without compromising the definition of the curl.

You can shake off hair and fluff the roots for an added increase in volume. Some curls want to be extremely defined by their curls, and there are others who sacrifice a little of definition in exchange for volume – this is their unique preference.

However, if you like volume, you can rollover your head and fluff it to your roots. Once you’ve done that, try to avoid touching your hair all day long and avoid causing more friction.

Dos and Donts When Diffusing

Diffusion of your curls can assist not only to speed up drying but to improve your natural curls efficiently. We would like to share with those of you who are new to diffusing or already a part of the diffusing team some “DO’S and DON’Ts:”

Dos:

1. Flip your head so that you hang wet curls front and spread them up.

Diffuse gently in an upward movement and then move to another location and do the same.

A great effect is that when you diffuse with your head turned forward, you get considerably more volume of your curly hairdo. It is vital to keep the dryer moving instead of merely holding it. Download the diffuser and let the bend drop into the diffuser and relocate it every time you move it to a new curl area. This technique is repeated until the curls are 75-90% dry and the remainder of the air is fully dry without touching it.

2. Turn it around and offer the COLD air to your curls.

This does three things: It refreshes the curls first. You can thus detect whether they’re really dry vs still moist. Second, your curls dry more quickly: if you combine hot and cold air, it’s a big bonus if you’re rushing as well. It helps finally solidify the development of the ringlets and properly seal the cuticle.

3. Use high heat with a low setting

Lower configuration allows control and localization of the airflow. When your curls move, the fewer frizzes you finish up with throughout the diffusion process. This is mainly the objective we strive to achieve when disseminating curls.

Don’ts:

1. Never diffuse into your curls!

If you’re standing right in front of the mirror and positioning the diffuser horizontally, you’ll remain there all day. It will take a lot of time while you’re waiting to dry in that particular location. As all the curls are gathered, the air can move to no place. Finally, it might perhaps damage your curling formation, which you have just worked so difficult to produce.

2. Don’t utilize HOT air when your damp hair is being diffused.

If you continue to only utilize hot air beyond the first 5 minutes, you may either melt or dry your curls totally much longer. Although the hair cuticle, which helps strengthen the ringlet form to remain in place, is screened at a high temperature as you begin to diffuse. You won’t get far if you initially start spreading damp hair with chilly air.

3. Do not skip the protective heat.

Prevention is the greatest approach to stop harm. You can make sure your curls are safe when you add more support, volume, and brightness to your style with a high-grade heat protectant. This is a win-win! 

Conclusion

We hope these suggestions and guides will help you in your first effort if you have not attempted to diffuse it before! Recall that it’s excellent practice!

For those of you who already diffuse and seek optimum results, try some of the tactics, and these changes can offer you the results you are searching for if there is anything you should not do.

Diffusion can reduce drying time, fill curls, shut down freezes, etc. Basically, you’ll need a diffuser in your life if you dry your curls with heat.

Elizabeth

Elizabeth

A beauty blogger. Has knowledge in hair care, skin care and everything else!

Post Like This

Subscribe to our newsletter